Find out what you should look for in one of our digitally signed documents.
Quick links:
RELY ON THE PDF
SIGNiX produces digitally signed PDF documents. The PDF file format is well-known and is an international standard (ISO 32000-1). SIGNiX chose PDF because it is the most mature platform today supporting digital signatures. PDF first supported this technology way back in 1999, and since then has added on numerous powerful capabilities that each SIGNiX signature takes full advantage of.
When you receive a document signed by SIGNiX, first be sure you’re looking at a PDF file on your computer or mobile device…not a paper copy. While a paper copy can be useful as a reference, you will see that the PDF file has numerous features and functions that help you to trust the document. If you’ve been given a paper copy and asked to trust it, be sure you ask for the electronic version as well and look for all of the elements described below.
To open the PDF, SIGNiX recommends you use a fully-standards compliant PDF viewer such as the free Adobe Reader, downloadable here. Adobe Reader on Windows or MacOS X provides the best experience when it comes to viewing digitally signed documents from SIGNiX.
You can also use the free PDF viewer applications from Nitro and Fox-It, though some of the icons may look different than what’s presented here. If you’re using a mobile device, SIGNiX strongly recommends you use the free Adobe Reader app available on the App Store and Google Play store, as the PDF signatures will render differently on iOS and Android devices.
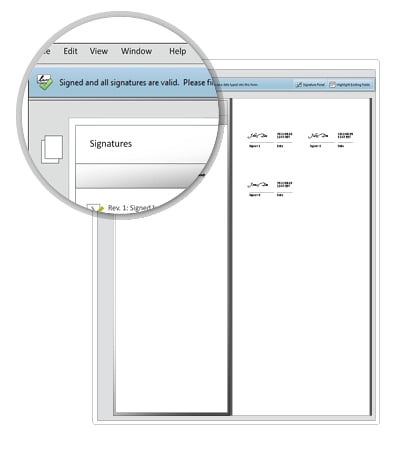
TRUST THE GREEN CHECKMARK
Now that you’re looking at a PDF file, what’s next? If you’ve opened the file with the free Adobe Reader, look for the green checkmark at the top of the screen:
This lets you know immediately that nothing has changed in the document since the last signature was applied to the document, and that all changes have been signed off. Note that this icon will look different in other PDF viewers, and is not available on mobile devices as of September 2013.
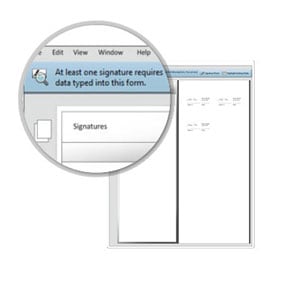
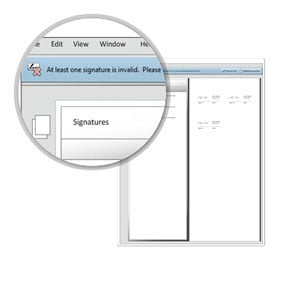
When should you be concerned? When you see any of the following icons:
Yellow Exclaimation PointThis icon is letting you know that something may have changed after the last signature was applied. Perhaps it was meant to be done, but the software is letting you know to be on notice. If you click the pen icon on the left side, you will see an in-document change tracker, showing you each of the signatures applied, and in this case, changes (such as this strike-through) made after the last signature. |
 |
Magnifying GlassThis icon lets you know that something was just changed in the document you are looking at. You will need to ‘validate’ the signatures for Reader to let you know what changed. Simply click the pen icon and then the ‘Validate All’ button. The icon should then change. |
 |
Red XIf, however, you see the Red X above, you should not trust this document. This means that substantive changes have been made to the document and the integrity of the original PDF is compromised. Get in touch with the organization or individual that sent you the document and ask for an original. |
 |
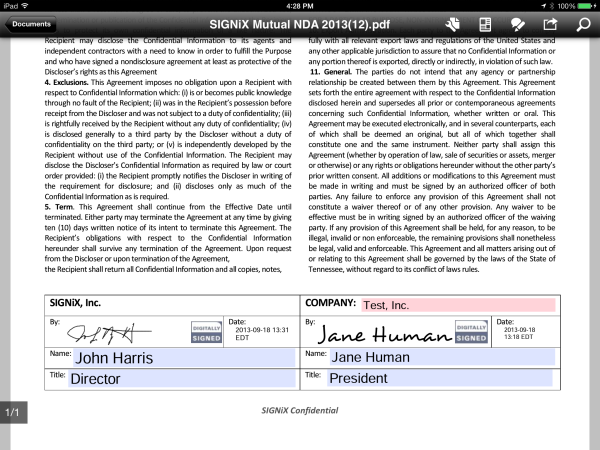
WHAT SHOULD THE SIGNATURE LOOK LIKE?
The digitally signed document you received might have one signature or twenty. What do you need to look for in regards to the signatures themselves?
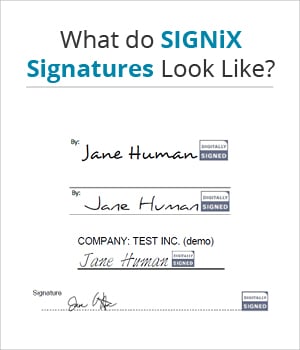
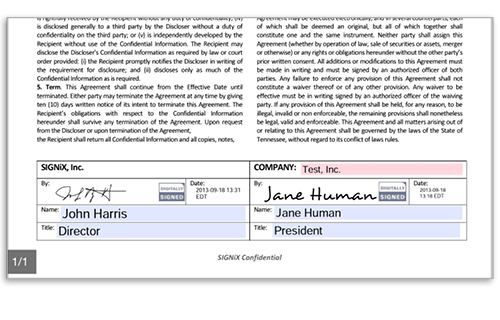
SIGNiX signatures can come in multiple appearances, as shown here. Signers can choose from one of several signature fonts and can also use their finger or mouse to draw their signature or initial too.
These signatures aren’t just images or pictures of a signature with a link to some third party website. Each SIGNiX signature and initial creates a tamper-evident seal on the document and embeds critical information about the signature into the document itself. If you’re viewing this document in Adobe Reader or another PDF viewer on Windows or Mac, you can click on each signature to get at this information. Here are some highlights.
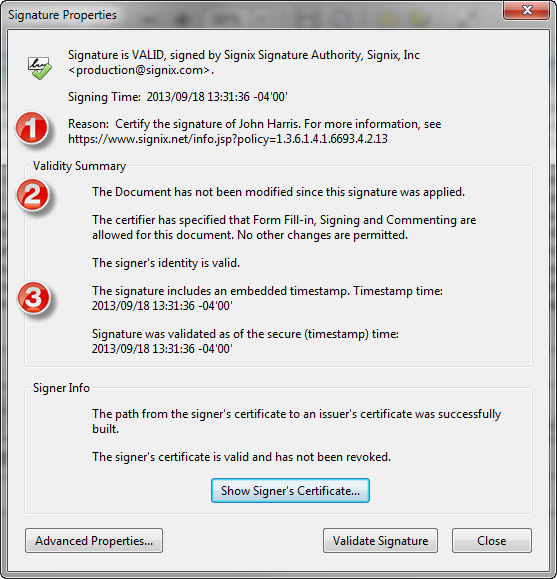
1) Reason Code should include name of signer.
2) Has the document been tampered with?
3) Embedded timestamp should show time of actual signature.
To make sure a signer has signed through SIGNiX, you’ll want to also look for the following:
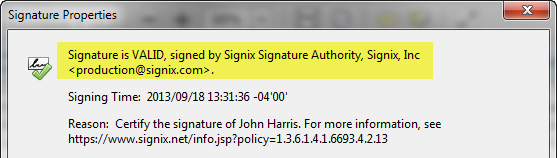
1) In the screen above, and shown here, look for the SIGNiX Signature Authority.
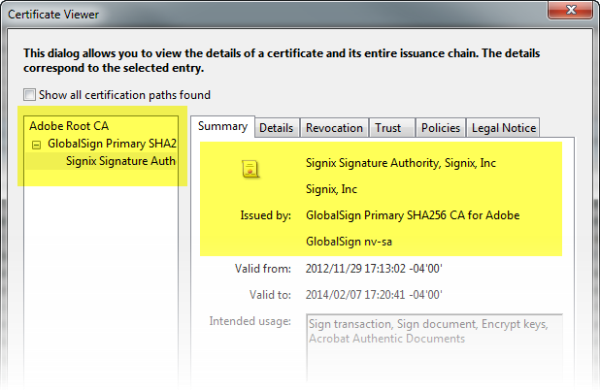
2) Also, if you click on Show Signer's Certificate, you will see the Certificate Viewer. To the left, you'll see a hierarchy of identity certificates...be sure yours looks like the list below, unless your organization is using alternate certificates.
SIGNATURE HISTORY™
Not only does each SIGNiX signature and initial create an embedded signature on the document, it also embeds a history of the document through each signature—we call this the Signature History™. With this feature, you can easily show what the document looked like when a particular signer signed the document. This is especially useful in multiple signature and party workflows where one signer may question the content of a document at the time of signature. It’s available within the document, even offline.
If you have received a document with more than one signature, you can take a look at the embedded Signature History within compliant PDF viewers on Windows and Mac computers. Follow these steps:
1) Right-click (Cmd-click) on a signature, and choose View Signed Version.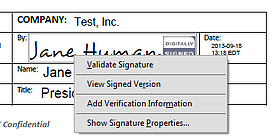
2) The PDF viewer will create a new window displaying what the document looked like when that signer signed the document.

VIEWING ON MOBILE DEVICES
Many of the advanced cryptographic capabilities of the PDF format have not yet found their way to mobile devices, so you need to be sure to understand what you can expect to see when looking at a SIGNiX digitally signed document on a mobile device. Because of a current lack of support for these features on most mobile devices, the visibility of signatures and function may differ. Some native apps may incorrectly not display the signatures, so it’s important to know how to view these signatures properly. Don’t worry! The signatures ARE there, but the native viewer just doesn’t yet know what to do with them.

SIGNiX strongly recommends installing the free Adobe Reader app for iOS or Android, as this app will correctly show the appearance of any PDF digital signature.
Once you’ve installed the app, follow the instructions below to open a signed PDF in the app.
If you received the document as attachment in email - iOS
1) Scroll (if necessary to find the attachment icons. Tap to download them, if required.
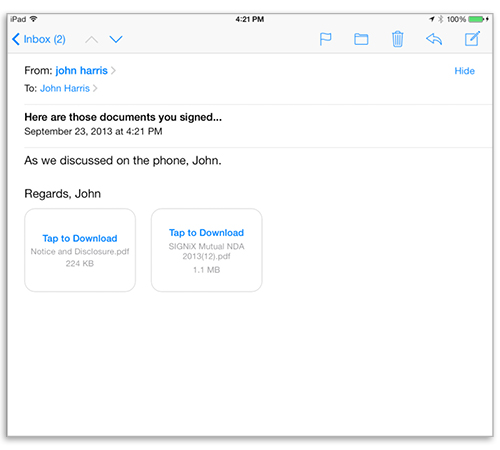
2) The PDF attachment may be downloaded, or it may be previewed in-line with the email.
3) Hold your finger on the attachment icon or the previewed document until a new dialog pops-up. Adobe Reader should be one of the apps you can choose from.
4) Tap on the Adobe Reader app and the file will preview correctly, with all signatures.
If you received the document as attachment in email - Android
1) Choose Attachments from the middle tab bar to view the attachments.
2) Tap the Load button to download the files to your Android device.
3) Tap the View button. A list of applications able to open the PDF should be displayed, if you haven’t already assigned a default.
4) Tap on the Adobe Reader icon, and then tap Always. From here on, all PDF files will be viewed in Adobe Reader.
5) The file should now open in Adobe Reader and be displayed correctly, with all signatures visible.
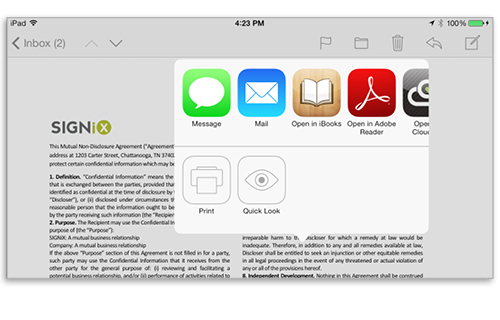
Document already in ‘preview’ / Quick Look - iOS
1) If you only have one attachment in an email, or you downloaded a digitally signed file, you may already be looking at the PDF. If you’re in a browser like Safari, it may have opened in a new tab. You may be wondering where the signatures are…they’re there, you just need to open it in Adobe Reader.
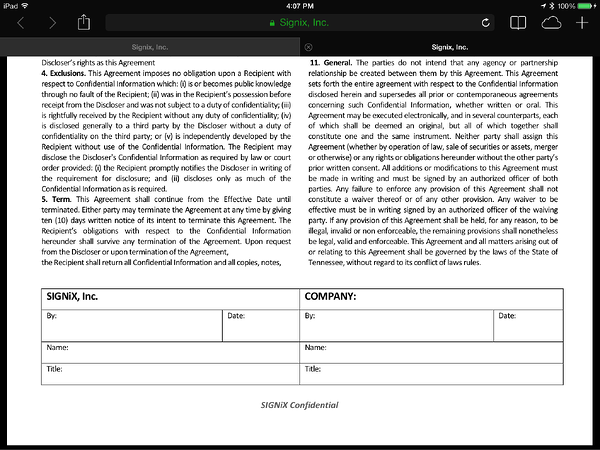
To ensure you’re seeing it correctly, tap your finger once on the screen. In the upper right hand corner you should see an icon that looks like a box with an arrow pointing out of it or you may see the words Open in…
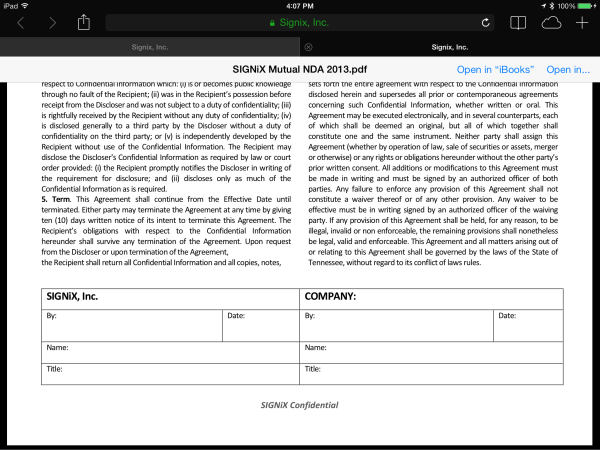
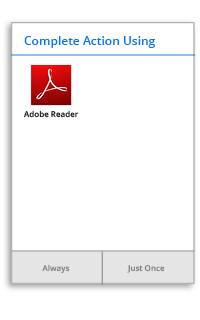
2) Tap on that icon or those words, and you’ll see the following dialog.
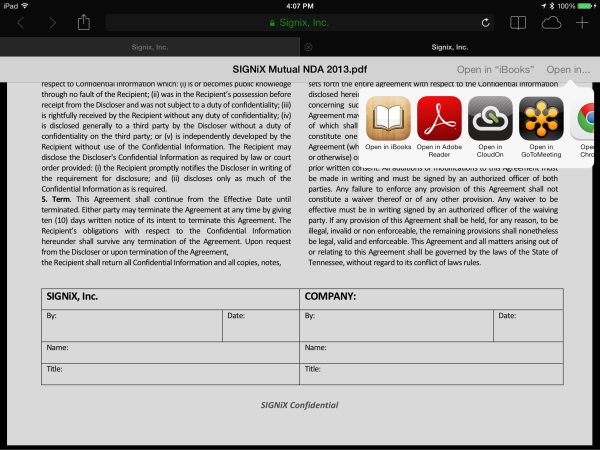
3) Now, click on the Adobe Reader icon, and you’ll see the document as it was intended with the signatures you were expecting.
Note that features like the green checkmark, Signature History™ and other embedded information will not be available on a mobile device due to its more limited capabilities, so if you have questions about the document, be sure to open it on a Windows or Mac computer in Adobe Reader (or other app as described above) to dig deeper into these other assurance features.
TOTALAUDIT™
Now that you understand what you need to be looking for with the digitally signed document from SIGNiX, be sure that you also are able to view or access a copy of the audit trail or event history behind the transaction. SIGNiX recommends that signers in a transaction download not only the PDF versions of their signed documents, but also at least the PDF version of the audit trail.
This transactional audit trail traces every single event from the initiation of the transaction to its final steps, capturing key legal points, including transaction start, email delivery, site entry, consent, authentication result, document presentation, each signature or initial, agree/acknowledge tasks, transaction end, document presentation post-transaction and many other events. The audit trail also stores all opt out and comment activity.